


How To: Add a Wave Spectrum Source Using a Mic in OBS
If you’ve dropped in on the livestreams on the Centaku Media channel on Twitch, you may have noticed something really neat during the gameplay! In lieu of a webcam in the current stage of channel growth, I opted for something different.
All you need is a PC with the latest Windows OS (or a workaround to get Windows programs running in a different OS environment, based on your setup), an installation of OBS, and an installation of the legendary media player, Winamp. To get a grasp of this tutorial, you should already be familiar with customizing OBS. If you have yet to watch any of the streams, check out a highlight below to see the spectrum in action.
https://www.twitch.tv/videos/439940956
To achieve this, download the Winamp program from the website. Then, after installation, you will need to make sure the Line In plugin is enabled. After you do this, you will want to make sure your microphone is set as a default device for Winamp to pick up the mic source only. (Note: the Line In plugin works “out of the box”, so it will take minor trial and error, especially with custom setups, to get what you want.)
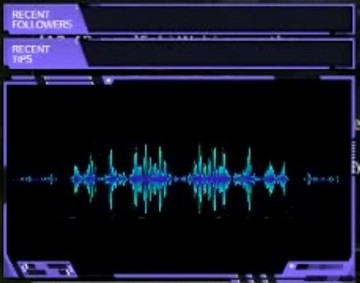
After you verify the Line In plugin is enabled, go to “File”, and “Play URL…”, and type “linein://” (without quotes) into the field. Winamp will now play the Line In source as a media file. Then you can check out the visualization tab. It includes pre-installed visualizations, which is probably not what you’re looking for. But you can visit the Visualization page on the Winamp Heritage Plugin Archive for the ones similar to the one I use, which is Classic Spectrum Analyzer.
Adding the Spectrum in OBS
Once you have the visualization to your liking, let’s add it to OBS. After OBS has loaded up, add Winamp as a Source under Window Capture, and make sure the transformation of the Scene fits and stretches to the screen. This is important: you will want to have the Winamp window completely maximized. Also, whenever you use the spectrum, Winamp cannot be minimized, or it will pause the visualization.
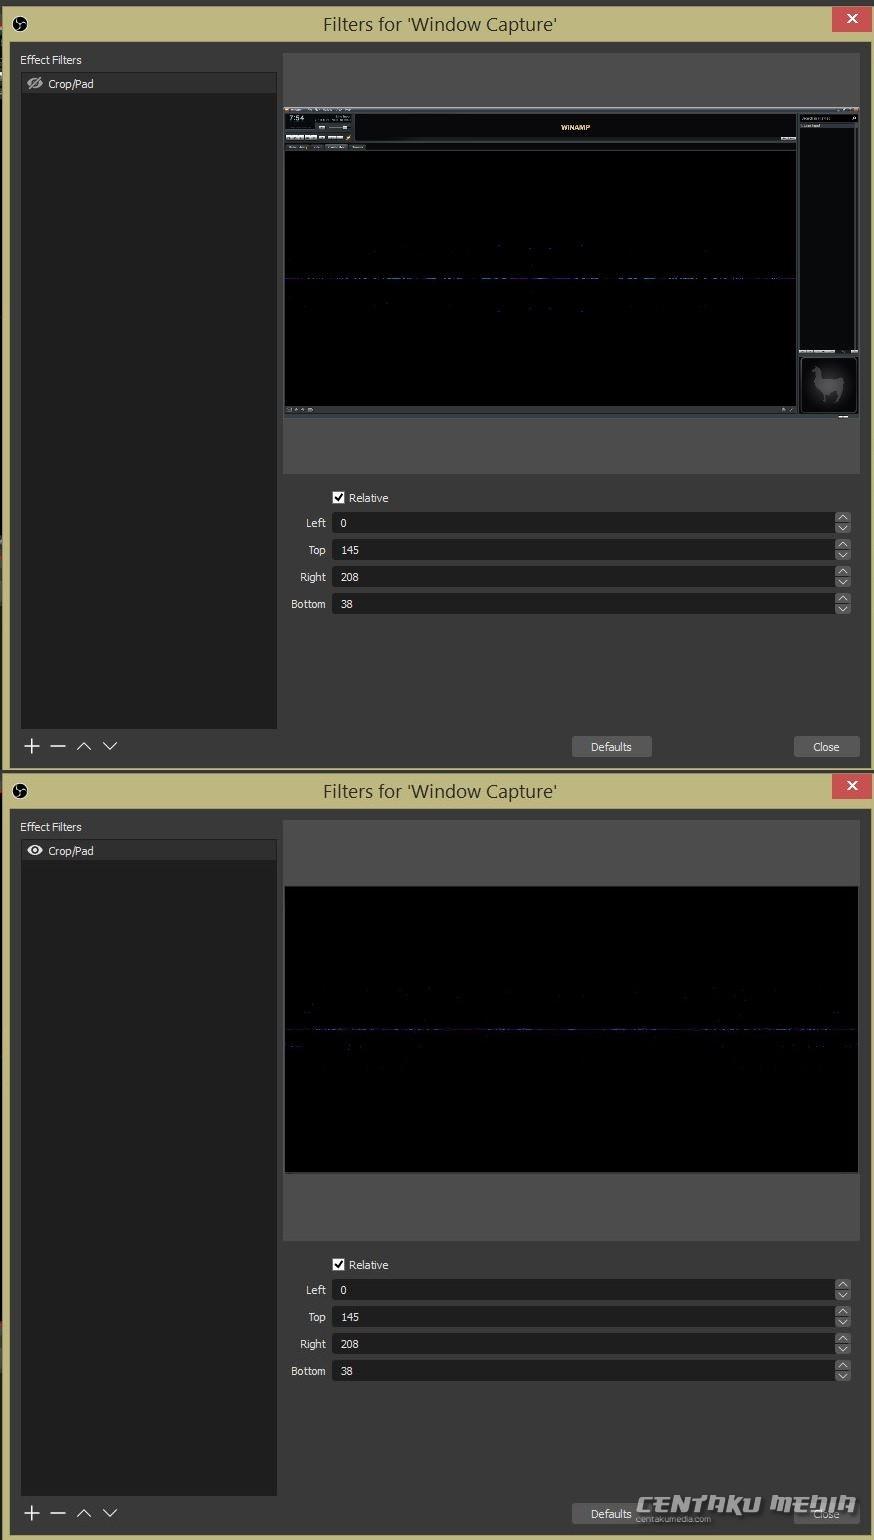
After adding the Window Capture, you need to adjust the viewpoint to where only the spectrum shows. Add a Crop/Pad filter on the Capture source, and adjust it to where only the visual is seen.
After applying the settings, you can now move the Source around to your liking, such as behind a cam overlay! That all there is to it! If you liked this, please share it and credit with others!
One more thing: If you experience issues with Winamp, it can be fixed by going into Winamp’s Safe Mode. This is also the case if the program hangs after being closed with the visualization tab left as the last used tab after closing it, then loading Winamp after a PC reboot.
Discover more from Centaku Media
Subscribe to get the latest posts sent to your email.
Related Posts


One thought on “How To: Add a Wave Spectrum Source Using a Mic in OBS”